AlmaLinux8.8インストール後に最初に行う基本設定

・AlmaLinux8.8のインストール後に基本設定として行うべきことを知りたい
こういった疑問に答えます。
本記事の内容
- AlmaLinux8.8のインストール後に行う基本設定の手順

この記事を書いている私は、某SIerに勤務しながら、
WEB系エンジニア・インフラエンジニアに憧れて、プログラミングおよびインフラ技術の勉強をしています。
こういった私が、解説していきます。
私が実機で試したコマンドや画像を載せて書いています。
記事の信頼性担保に繋がると思います。
- 本記事の内容
- AlmaLinux8.8のインストール後に行う基本設定の手順
- インフラエンジニアになるための勉強のやり方
AlmaLinux8.8のインストール後に行う基本設定の手順
手順① selinuxの無効化
インストール直後はselinuxが有効になっているので、無効化します。
[root@SV-ALTAIR ~]# getenforce
Enforcing
vi /etc/selinux/config
# This file controls the state of SELinux on the system.
# SELINUX= can take one of these three values:
#     enforcing - SELinux security policy is enforced.
#     permissive - SELinux prints warnings instead of enforcing.
#     disabled - No SELinux policy is loaded.
SELINUX=disabled ★★★disabledに変更
# SELINUXTYPE= can take one of these three values:
#     targeted - Targeted processes are protected,
#     minimum - Modification of targeted policy. Only selected processes are protected.
#     mls - Multi Level Security protection.
SELINUXTYPE=targeted
一度、OS再起動すると、無効になります。
[root@SV-ALTAIR ~]# getenforce
Disabled
手順② firewalldの基本設定
(1)管理用のゾーンを作成
firewall-cmd --new-zone=managezone --permanent
firewall-cmd --zone=managezone --set-target=ACCEPT --permanent
[root@SV-ALTAIR ~]# firewall-cmd --new-zone=managezone --permanent
success
[root@SV-ALTAIR ~]# firewall-cmd --zone=managezone --set-target=ACCEPT --permanent
success
(2)管理用のゾーンにsshを許可
firewall-cmd --zone=managezone --add-service=ssh --permanent
[root@SV-ALTAIR ~]# firewall-cmd --zone=managezone --add-service=ssh --permanent
success
(3)管理用のゾーンに接続元のIPアドレス追加
firewall-cmd --zone=managezone --add-source=[IPアドレス] --permanent
[root@SV-ALTAIR ~]# firewall-cmd --zone=manage --add-source=192.168.100.101/32 --permanent
success
(4)設定を反映して確認
firewall-cmd --reload
[root@SV-ALTAIR ~]# firewall-cmd --reload
success
firewall-cmd --get-active-zones
[root@SV-ALTAIR ~]# firewall-cmd --get-active-zones
managezone
  sources: 192.168.100.101/32
public
  interfaces: ens18
(5)デフォルトのpublicゾーンからsshを除去
firewall-cmd --remove-service=ssh --zone=public --permanent
[root@SV-ALTAIR ~]# firewall-cmd --remove-service=ssh --zone=public --permanent
success
(6)設定を反映して確認
firewall-cmd --reload
[root@SV-ALTAIR ~]# firewall-cmd --reload
success
firewall-cmd --list-all
[root@SV-ALTAIR ~]# firewall-cmd --list-all
public (active)
  target: default
  icmp-block-inversion: no
  interfaces: ens18
  sources:
  services: cockpit dhcpv6-client
  ports:
  protocols:
  forward: no
  masquerade: no
  forward-ports:
  source-ports:
  icmp-blocks:
  rich rules:
手順③ 不要なサービスの無効化
[root@SV-ALTAIR ~]# systemctl disable auditd.service
[root@SV-ALTAIR ~]# systemctl disable smartd.service
[root@SV-ALTAIR ~]# systemctl disable mdmonitor.service
手順④ 時刻同期の確認
chronyc tracking
[root@SV-ALTAIR ~]# chronyc tracking
Reference ID    : D2ADA057 (ntp3.jst.mfeed.ad.jp)
Stratum         : 3
Ref time (UTC)  : Mon Jun 19 22:36:40 2023
System time     : 0.000150253 seconds fast of NTP time
Last offset     : +0.000170358 seconds
RMS offset      : 0.000172865 seconds
Frequency       : 25.949 ppm fast
Residual freq   : +0.004 ppm
Skew            : 0.048 ppm
Root delay      : 0.097652599 seconds
Root dispersion : 0.019040978 seconds
Update interval : 1043.5 seconds
Leap status     : Normal
chronyc sources
[root@SV-ALTAIR ~]# chronyc sources
MS Name/IP address         Stratum Poll Reach LastRx Last sample
===============================================================================
^* ntp3.jst.mfeed.ad.jp          2  10   377   765   +715us[ +885us] +/-   70ms
手順⑤ 管理用ユーザーをwheelグループに追加しrootユーザーをログイン無効化
(1)rootユーザーのログイン無効化
vi /etc/ssh/sshd_config
# Authentication:

#LoginGraceTime 2m
PermitRootLogin no ★★★noに変更
#StrictModes yes
#MaxAuthTries 6
#MaxSessions 10
(2)管理者ユーザーをwheelグループに追加
usermod -g wheel [ユーザー名]
id [ユーザー名]
[root@SV-ALTAIR ~]# usermod -g wheel satonaka
[root@SV-ALTAIR ~]# id satonaka
uid=1000(satonaka) gid=10(wheel) groups=10(wheel)
(3)su でrootになれるユーザーをwheelグループに制限
vi /etc/pam.d/su
auth required pam_wheel.so use_uid の頭の#を外して有効化します。
#%PAM-1.0
auth            required        pam_env.so
auth            sufficient      pam_rootok.so
# Uncomment the following line to implicitly trust users in the "wheel" group.
#auth           sufficient      pam_wheel.so trust use_uid
# Uncomment the following line to require a user to be in the "wheel" group.
auth            required        pam_wheel.so use_uid ★★★#を外して有効化
auth            substack        system-auth
auth            include         postlogin
account         sufficient      pam_succeed_if.so uid = 0 use_uid quiet
account         include         system-auth
password        include         system-auth
session         include         system-auth
session         include         postlogin
session         optional        pam_xauth.so
手順⑥ SSH公開鍵認証に変更しパスワード認証の無効化
(1)PubkeyAuthenticationをyesに変更
vi /etc/ssh/sshd_config
PubkeyAuthentication を yes に変更します。
# Authentication:

#LoginGraceTime 2m
PermitRootLogin no
#StrictModes yes
#MaxAuthTries 6
#MaxSessions 10

PubkeyAuthentication yes ★★★yesに変更
(2)ホームに.sshディレクトリ作成してパーミッション700に変更
mkdir ~/.ssh
chmod 700 ~/.ssh
[satonaka@SV-ALTAIR ~]$ mkdir ~/.ssh
[satonaka@SV-ALTAIR ~]$ chmod 700 ~/.ssh
(3)鍵ファイルをアップロードしてパーミッション600に変更


chmod 600 ~/.ssh/authorized_keys
[satonaka@SV-ALTAIR ~]$ chmod 600 ~/.ssh/authorized_keys
(4)Tera Termで公開鍵認証での接続テスト

(5)従来のパスワード認証を無効化する
**必ず、公開鍵認証の接続テストでOKになってから、従来のパスワード認証を無効化してください。**
そうでないと、リモートでログインができなくなってしまい、
物理マシンに直接アクセスしたり、Proxmoxのコンソール画面から直接操作するか、
が必要になってしまいます。
そうでないと、リモートでログインができなくなってしまい、
物理マシンに直接アクセスしたり、Proxmoxのコンソール画面から直接操作するか、
が必要になってしまいます。
vi /etc/ssh/sshd_config
PasswordAuthentication を no に変更します。
# To disable tunneled clear text passwords, change to no here!
#PasswordAuthentication yes
#PermitEmptyPasswords no
PasswordAuthentication no ★★★noに変更
(6)WinSCPの変更

環境 > SFTP
sudo /usr/libexec/openssh/sftp-server を設定

環境 > シェル
sudo su - を設定

sftpサーバ利用時はsudo時にパスワード不要に変更。
visudo
## Read drop-in files from /etc/sudoers.d (the # here does not mean a comment)
#includedir /etc/sudoers.d
satonaka ALL=(ALL:ALL) NOPASSWD: /usr/libexec/openssh/sftp-server  ★★末尾に追記
手順⑦ パッケージの最新化
dnf update
最後に、パッケージを最新化して、一度、OS再起動しておきます。
自動更新の有効化
dnf install dnf-automatic
vi /etc/dnf/automatic.conf
[root@SV-ALTAIR ~]# dnf install dnf-automatic
[root@SV-ALTAIR ~]# vi /etc/dnf/automatic.conf
# Whether updates should be applied when they are available, by
# dnf-automatic.timer. notifyonly.timer, download.timer and
# install.timer override this setting.
apply_updates = yes  ★★yesに変更
systemctl enable dnf-automatic-install.timer
systemctl start dnf-automatic-install.timer
[root@SV-ALTAIR ~]# systemctl enable dnf-automatic-install.timer
Created symlink /etc/systemd/system/timers.target.wants/dnf-automatic-install.timer → /usr/lib/systemd/system/dnf-automatic-install.timer.
[root@SV-ALTAIR ~]# systemctl start dnf-automatic-install.timer
[root@SV-ALTAIR ~]# systemctl status dnf-automatic-install.timer
● dnf-automatic-install.timer - dnf-automatic-install timer
   Loaded: loaded (/usr/lib/systemd/system/dnf-automatic-install.timer; enabled; vendor preset: dis>
   Active: active (waiting) since Tue 2023-06-20 22:18:17 JST; 16s ago
  Trigger: Wed 2023-06-21 06:49:02 JST; 8h left

 6月 20 22:18:17 SV-ALTAIR systemd[1]: Started dnf-automatic-install timer.
手順⑧ root宛てのメールを転送
dnf install mailx
[root@SV-ALTAIR ~]# dnf install mailx
[root@SV-ALTAIR ~]# vi ~/.mailrc
~/.mailrc
[root@SV-ALTAIR ~]# cat ~/.mailrc
set smtp=smtp://sv-ceres.planet.space.com
set from="root@sv-altair.planet.space.com"
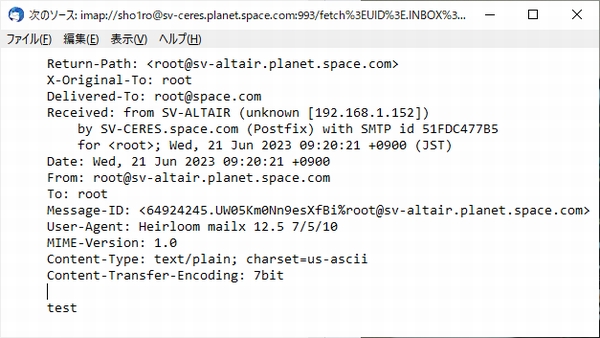
テスト
[root@SV-ALTAIR ~]# echo test|mail root

メールサーバー側の転送設定
[root@SV-CERES ~]# sed -i '/^root:/d' /etc/aliases
[root@SV-CERES ~]# echo "root: satonaka@space.com" >> /etc/aliases
[root@SV-CERES ~]# newaliases
参考書籍
Rocky Linux & AlmaLinux実践ガイド
LinuxにおけるITプロ向け定番書籍がRocky Linux 8 & AlmaLinux 8に対応
Rocky Linux 8 & AlmaLinux 8の運用管理にかかわるシステム管理者を対象に、
システム管理の基礎、ネットワーク、ストレージ、パフォーマンスチューニング、
バックアップ、障害対応など、
IT現場で役立つ幅広いシステム管理手法を網羅しています。
Rocky Linux 8 & AlmaLinux 8.5対応
 | Rocky Linux & AlmaLinux実践ガイド impress top gearシリーズ |
インフラエンジニアになるための勉強のやり方
私は、某SIerに勤務しながら、WEB系エンジニア・インフラエンジニアに憧れて、プログラミングおよびインフラ技術の勉強をしています。
現在の会社で直接担当している業務の中では、決まった技術しか触れないけれど、
「他にも将来役に立ちそうなインフラ技術を勉強したい」「働きながらでもできる効率的なインフラエンジニアの勉強方法を知りたい」と考えている方のために、
①おすすめの書籍と、②おススメのオンライン学習サイトを紹介します。
働きながら勉強するための、おススメの書籍と、オンラインで学習できるサイトの紹介です。
インフラエンジニアの勉強ができるおススメ書籍
朝の通勤時や帰宅時の電車の中や、社外打合せへの移動中などに勉強するなら、やはり書籍が一番だと思います。
インフラエンジニアの教科書
LINE社に創業時から在籍しているインフラエンジニア・プロマネの「佐野裕」さんの本です。 Tweets by sanonosa twitter.com
膨大なトラフィックをさばくLINE社にて構築・保守を行っている現役エンジニアが記すITインフラの必須知識と経験の数々! サーバ、OS、ネットワーク機器、データセンター、購買と商談、障害対応、大規模インフラ、成長するために必要なスキルなど、基礎知識から実践まで言及。 ITインフラの世界が理解できる珠玉の1冊!
 | インフラエンジニアの教科書 (C&R研究所) 佐野裕 |
1週間でLPICの基礎が学べる本
Linuxの資格「LPIC」の試験対策を初心者向けに書いた入門書です。
Linuxの資格として広く知られているLPICですが、あまり知識の無いまま試験対策を始める人も多いのではないでしょうか。しかし、試験対策書は試験範囲についてのみ解説しているものが多く、初心者が理解するのは困難です。本書は、初心者がスムーズに試験対策を行えるよう、事前に基礎固めを行うLinux入門書です。試験情報や模擬問題も掲載しているので、資格取得を視野に入れた効率的な基礎学習が行えます。
 | 1週間でLPICの基礎が学べる本 第3版 徹底攻略シリーズ (インプレス) 中島能和 |
以上、読んでいただきありがとうございました。